Online Booking and Appointment Scheduling widget for Framer
Bookla Plugin is a powerful tool for developers to integrate a customizable booking widget into their Framer projects.
Whether you're managing one-on-one appointments, open-ended slots, workshops, or ticketed events, this widget simplifies the process while maintaining a sleek and professional design.
Benefits
- Effortless integration with Framer.
- Customization options to match your branding.
Usage
With this widget, you can allow users to seamlessly schedule services directly from your webpage.
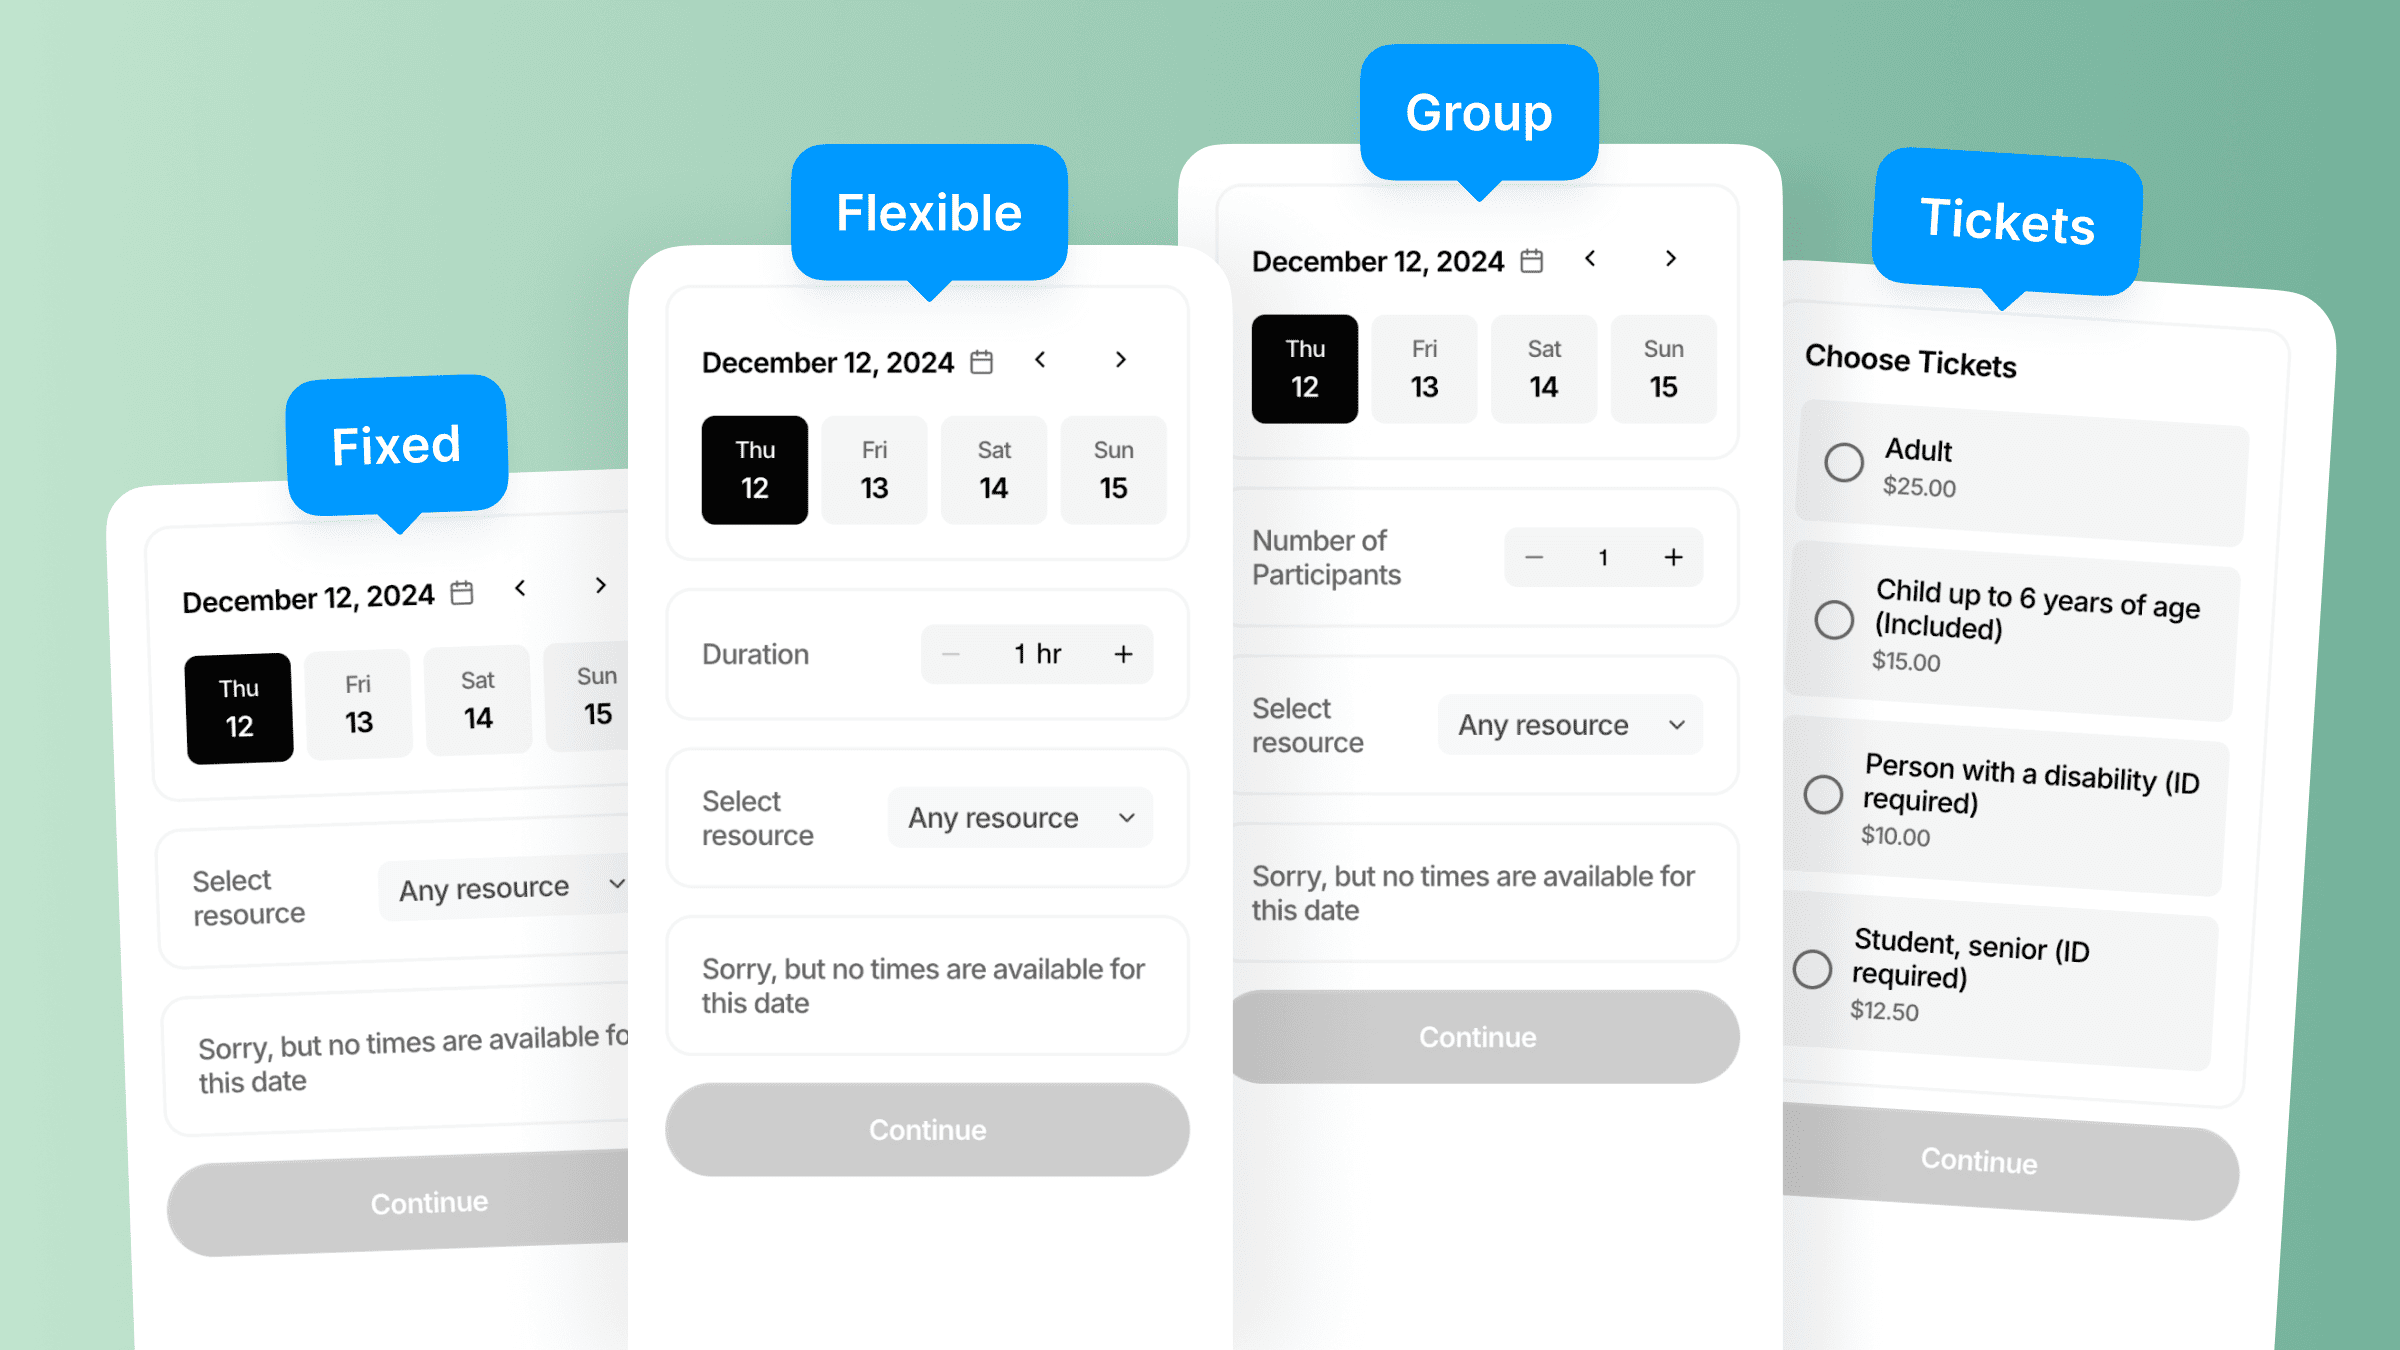
The widget supports four service types, offering flexibility for a wide range of booking needs:
| Type | Use Case | Additional Settings |
|---|---|---|
| Fixed | Single-session appointments | Resource block |
| Flexible | Open-ended booking slots | Duration & resource blocks |
| Group | Group events or workshops | Participants & resource blocks |
| Ticket | Ticketed events, concerts | Tickets |
I. Prerequisites
Before using the Booking widget from Bookla Plugin, ensure you have the following:
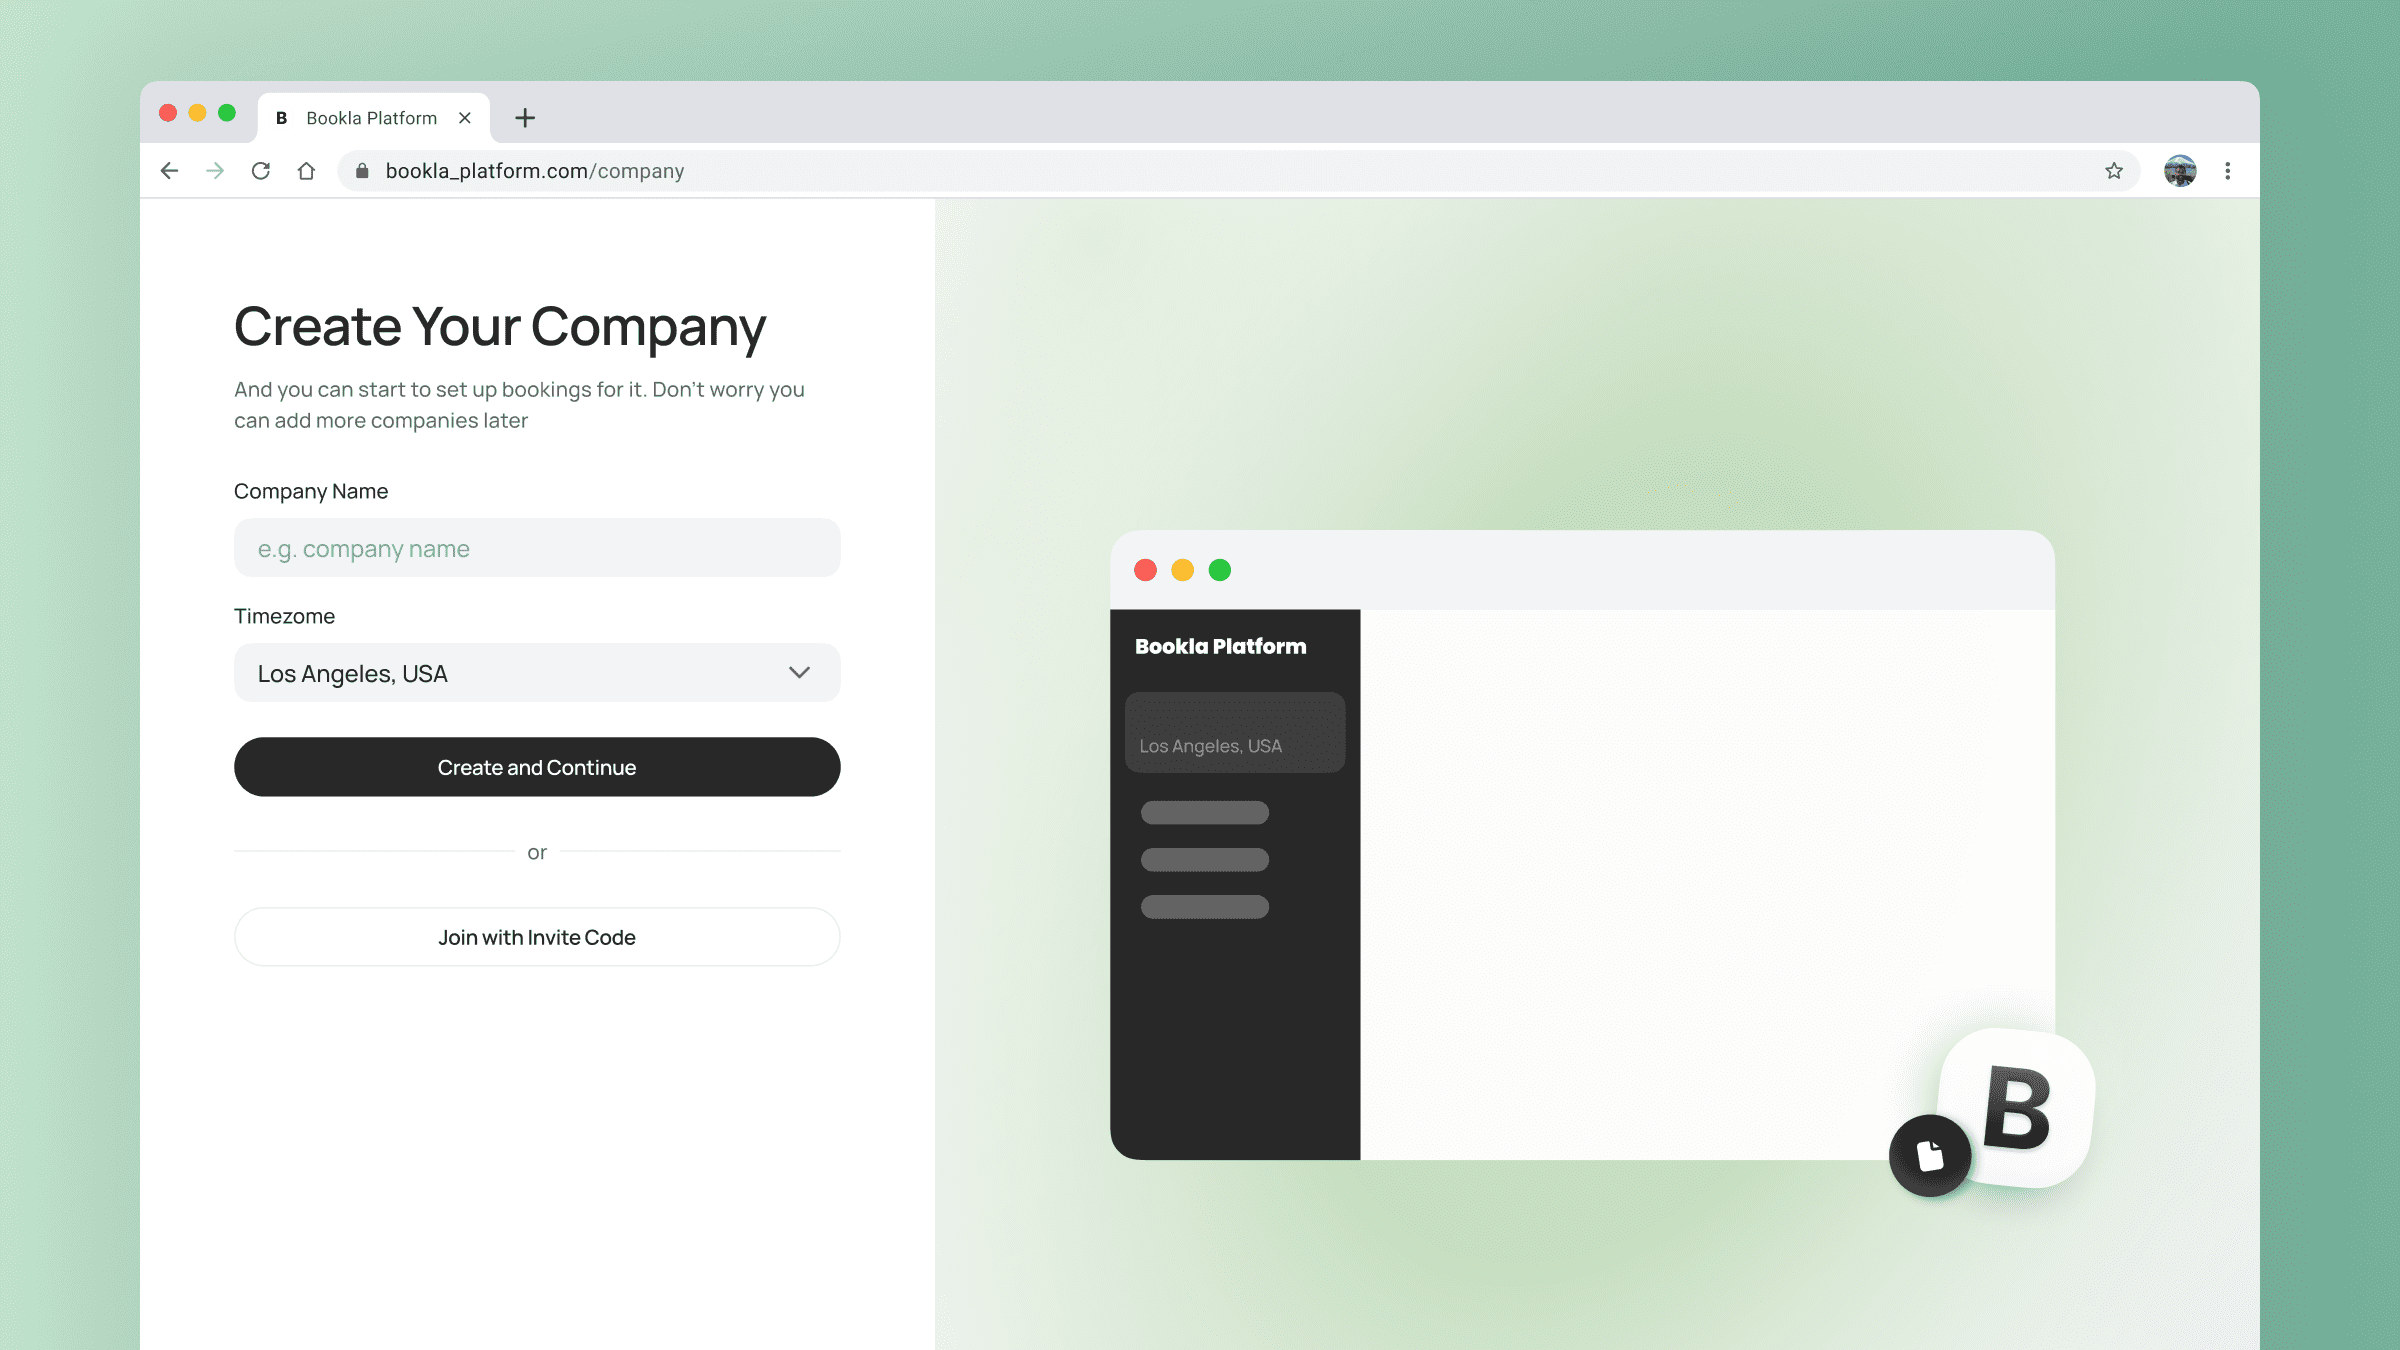
1. Create a Company in Bookla
This step is essential as it links your company id to the Framer widget.
- Open Bookla Platform Landing and tap ‘Create Account’.
- Use your credentials to create an account or log in.
- Create your company or use invite code to open it.
2. Set Up Your Resources
Resources are fundamental to the appointment scheduling process in Bookla.
In the Bookla ecosystem, a "resource" is any bookable entity offered by a company. This includes: Human resources (e.g., hairdressers, coaches, instructors) & Physical assets (e.g., tennis courts, guest houses, meeting rooms.
- Give a Name & Color.
- Set up Working Hours.
- Manage Availability. Recheck on the right top that your resource is
Enabledfor booking.
3. Set Up Your Service
A service in Bookla represents an offering provided by a company that can be booked by clients. Each service is linked to one or more resources.
- Give a Name & Color.
- Choose a Type. Ensure at least one service (Fixed, Flexible, Group, or Ticket) is created in your Bookla account. Please select type of the component, based on feature that you need for your case. Check the Comparison
- Add Settings, based on type. Refer to these guides for each type: **Fixed** , Flexible , **Group** and Ticket.
- Choose a Booking Policy. Instant Booking, Needs Confirmation or Needs Pre-payment ((How to Add Payments))
- Set Up Price. Without it your service will be free for users. How to Accept Payments
- Manage Availability. Recheck on the right top that your service is
Enabledfor booking.
4. Link Your Service with Resource
To make a service available for booking you need to
- Go to the Services.
- Select tab ‘Links’ and press ‘Link with Resource’.
- Add one or multiple resources.
Now easily see how your customized booking widget will look and function by clicking Preview in the top-right corner of the service page. This feature allows you to test the design, interactions, and overall user experience before publishing it live, ensuring everything looks perfect!
The available booking times are dynamically determined based on the Working Hours and Closing Periods you’ve set for each resource. Ensure these settings are correctly configured in the Bookla platform to reflect accurate availability for your users.
II. Adding the Widget in Framer
Learn how to seamlessly integrate the Bookla Booking widget into your Framer project, set it up for your services, and customize it to fit your design effortlessly.
- Install the Bookla Plugin
- Drag the Booking Widget
- Customize your Widget
- Set Up Routs
- Connect the Widget to Platform
Step 1: Install the Bookla Plugin
- Navigate to the Framer Marketplace.
- Tap ‘Open Plugin in…’ and select the Framer project where you want to use Booking Widget.
Or install the plugin directly from ‘Plugins’ section on your Framer Canvas:
- Tap ‘Plugins’
- Type ‘‘Bookla’ and Select to open it.
Step 2: Drag the Booking Widget
- Open the page where you want to see booking widget
- Choose what widget do you need to use: Fixed, Flexible, Group, Ticket.
- Drag it onto your design canvas. A placeholder widget will appear.
Step 3: Customize your widget
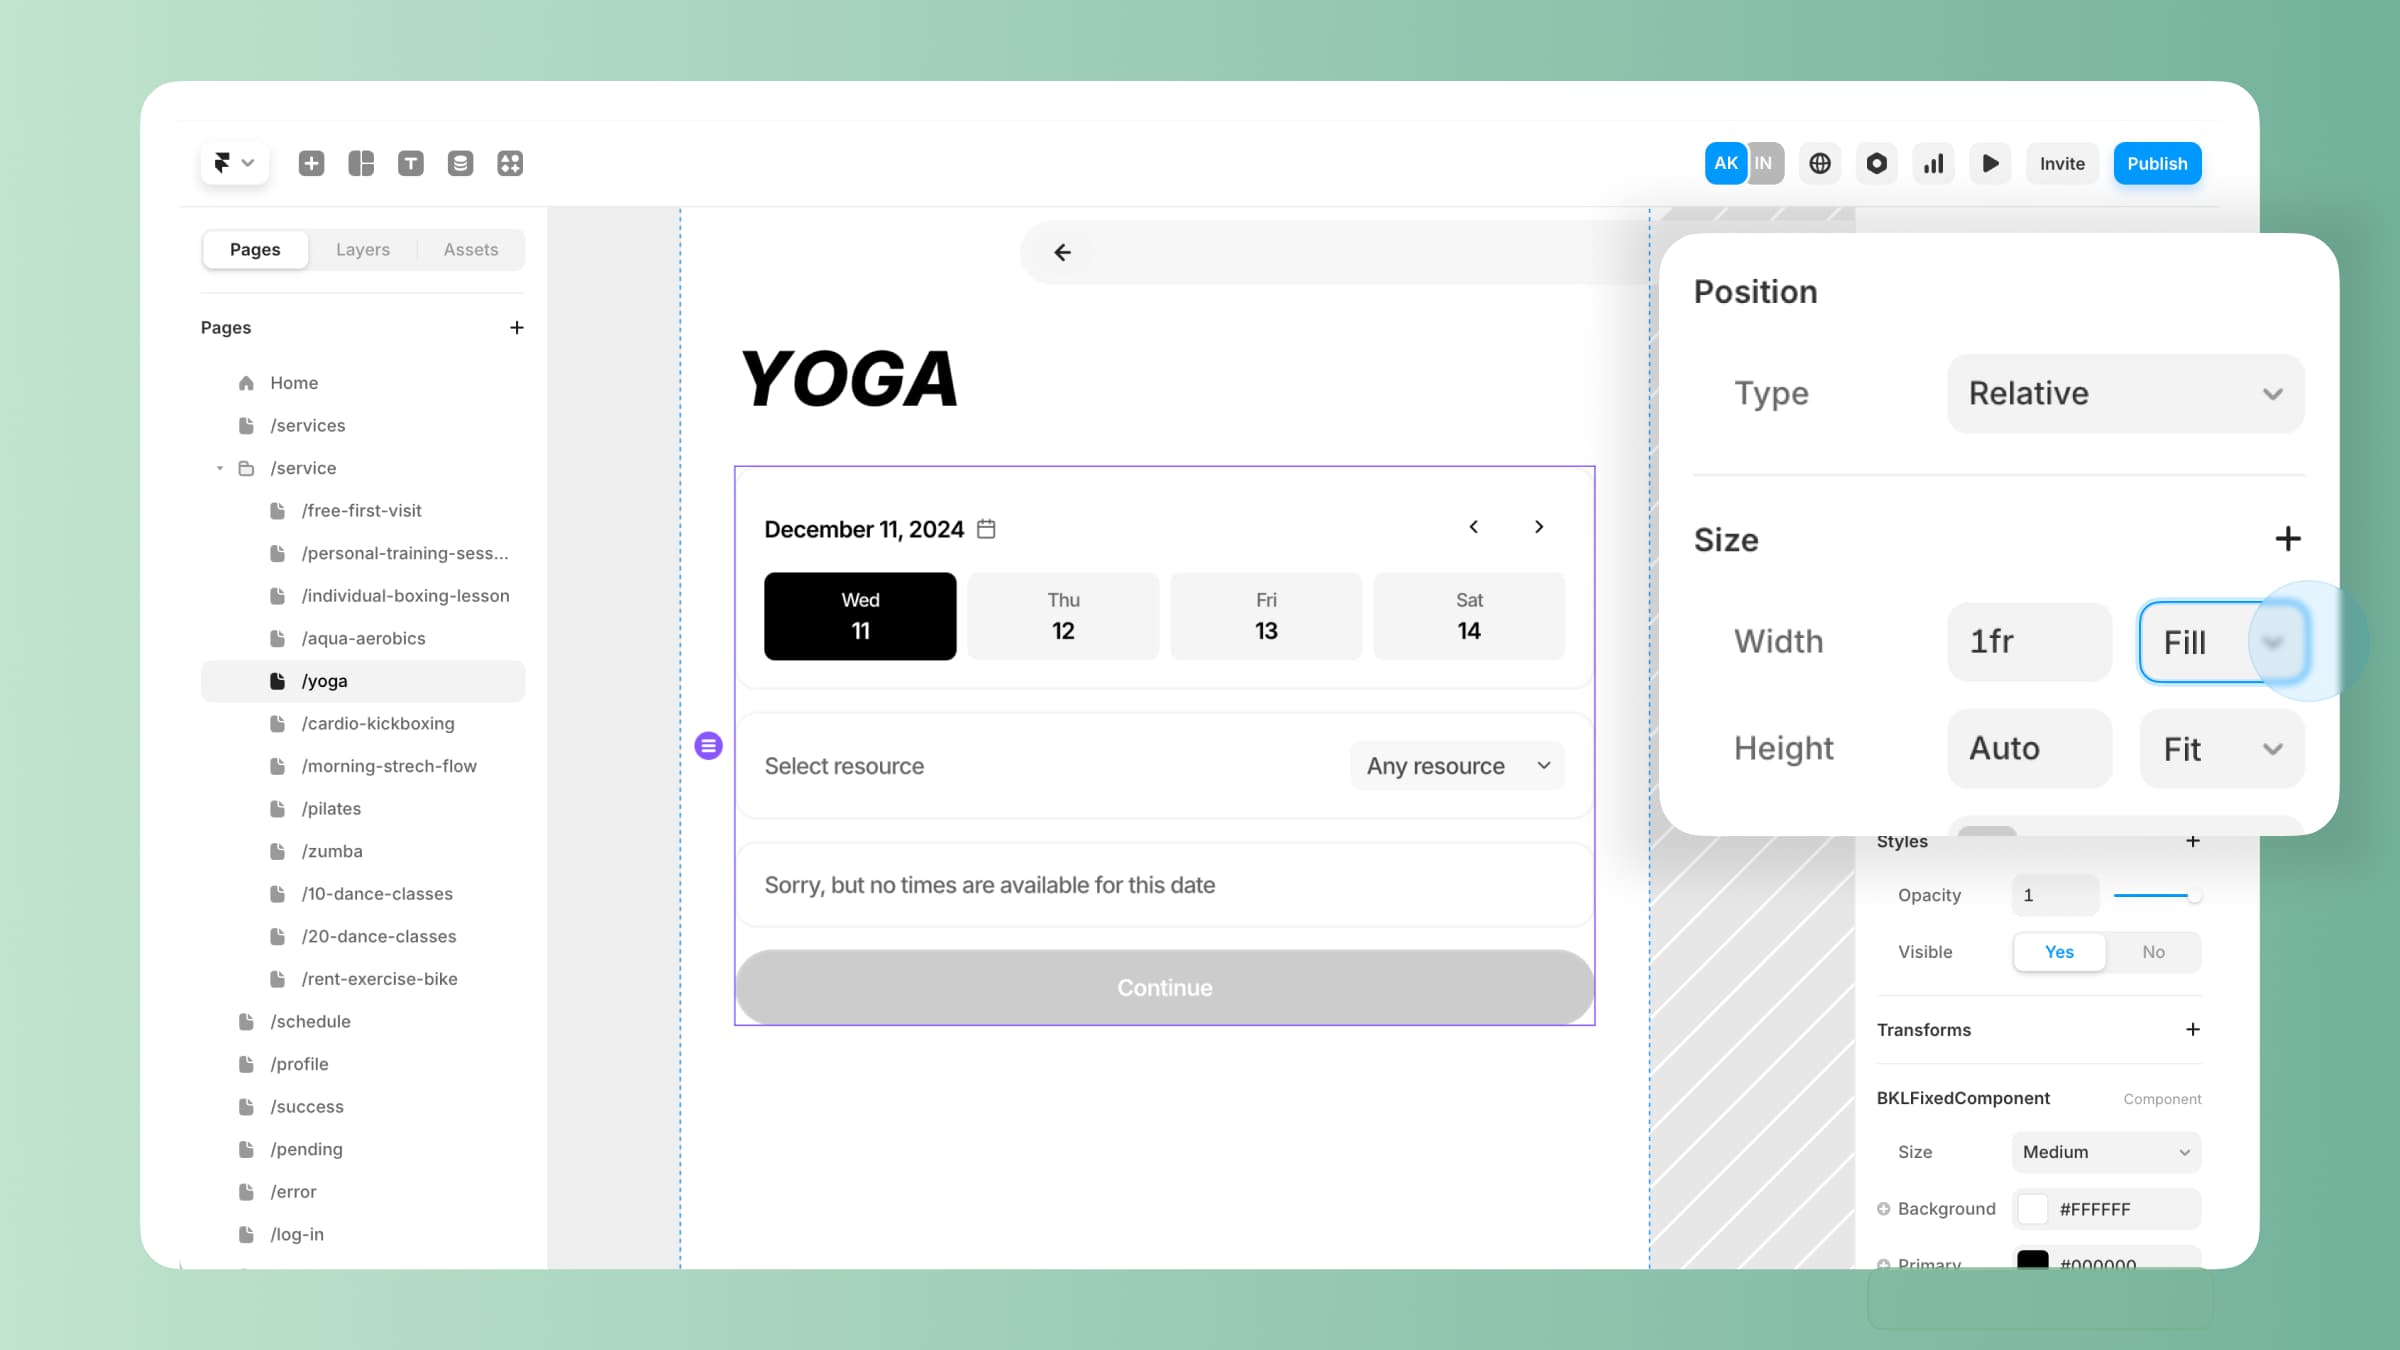
- Move Booking widget in existing auto layout or create new. More about **Framer Auto layouts.**
- Use the right panel to set up settings like ‘Fill.’ It’s an essential feature to make your widget responsive to different screen sizes.
- Use the Framer UI to adjust the appearance of the widget: Size, Colors, Texts and so on. **Read More.**
3.1 Structure
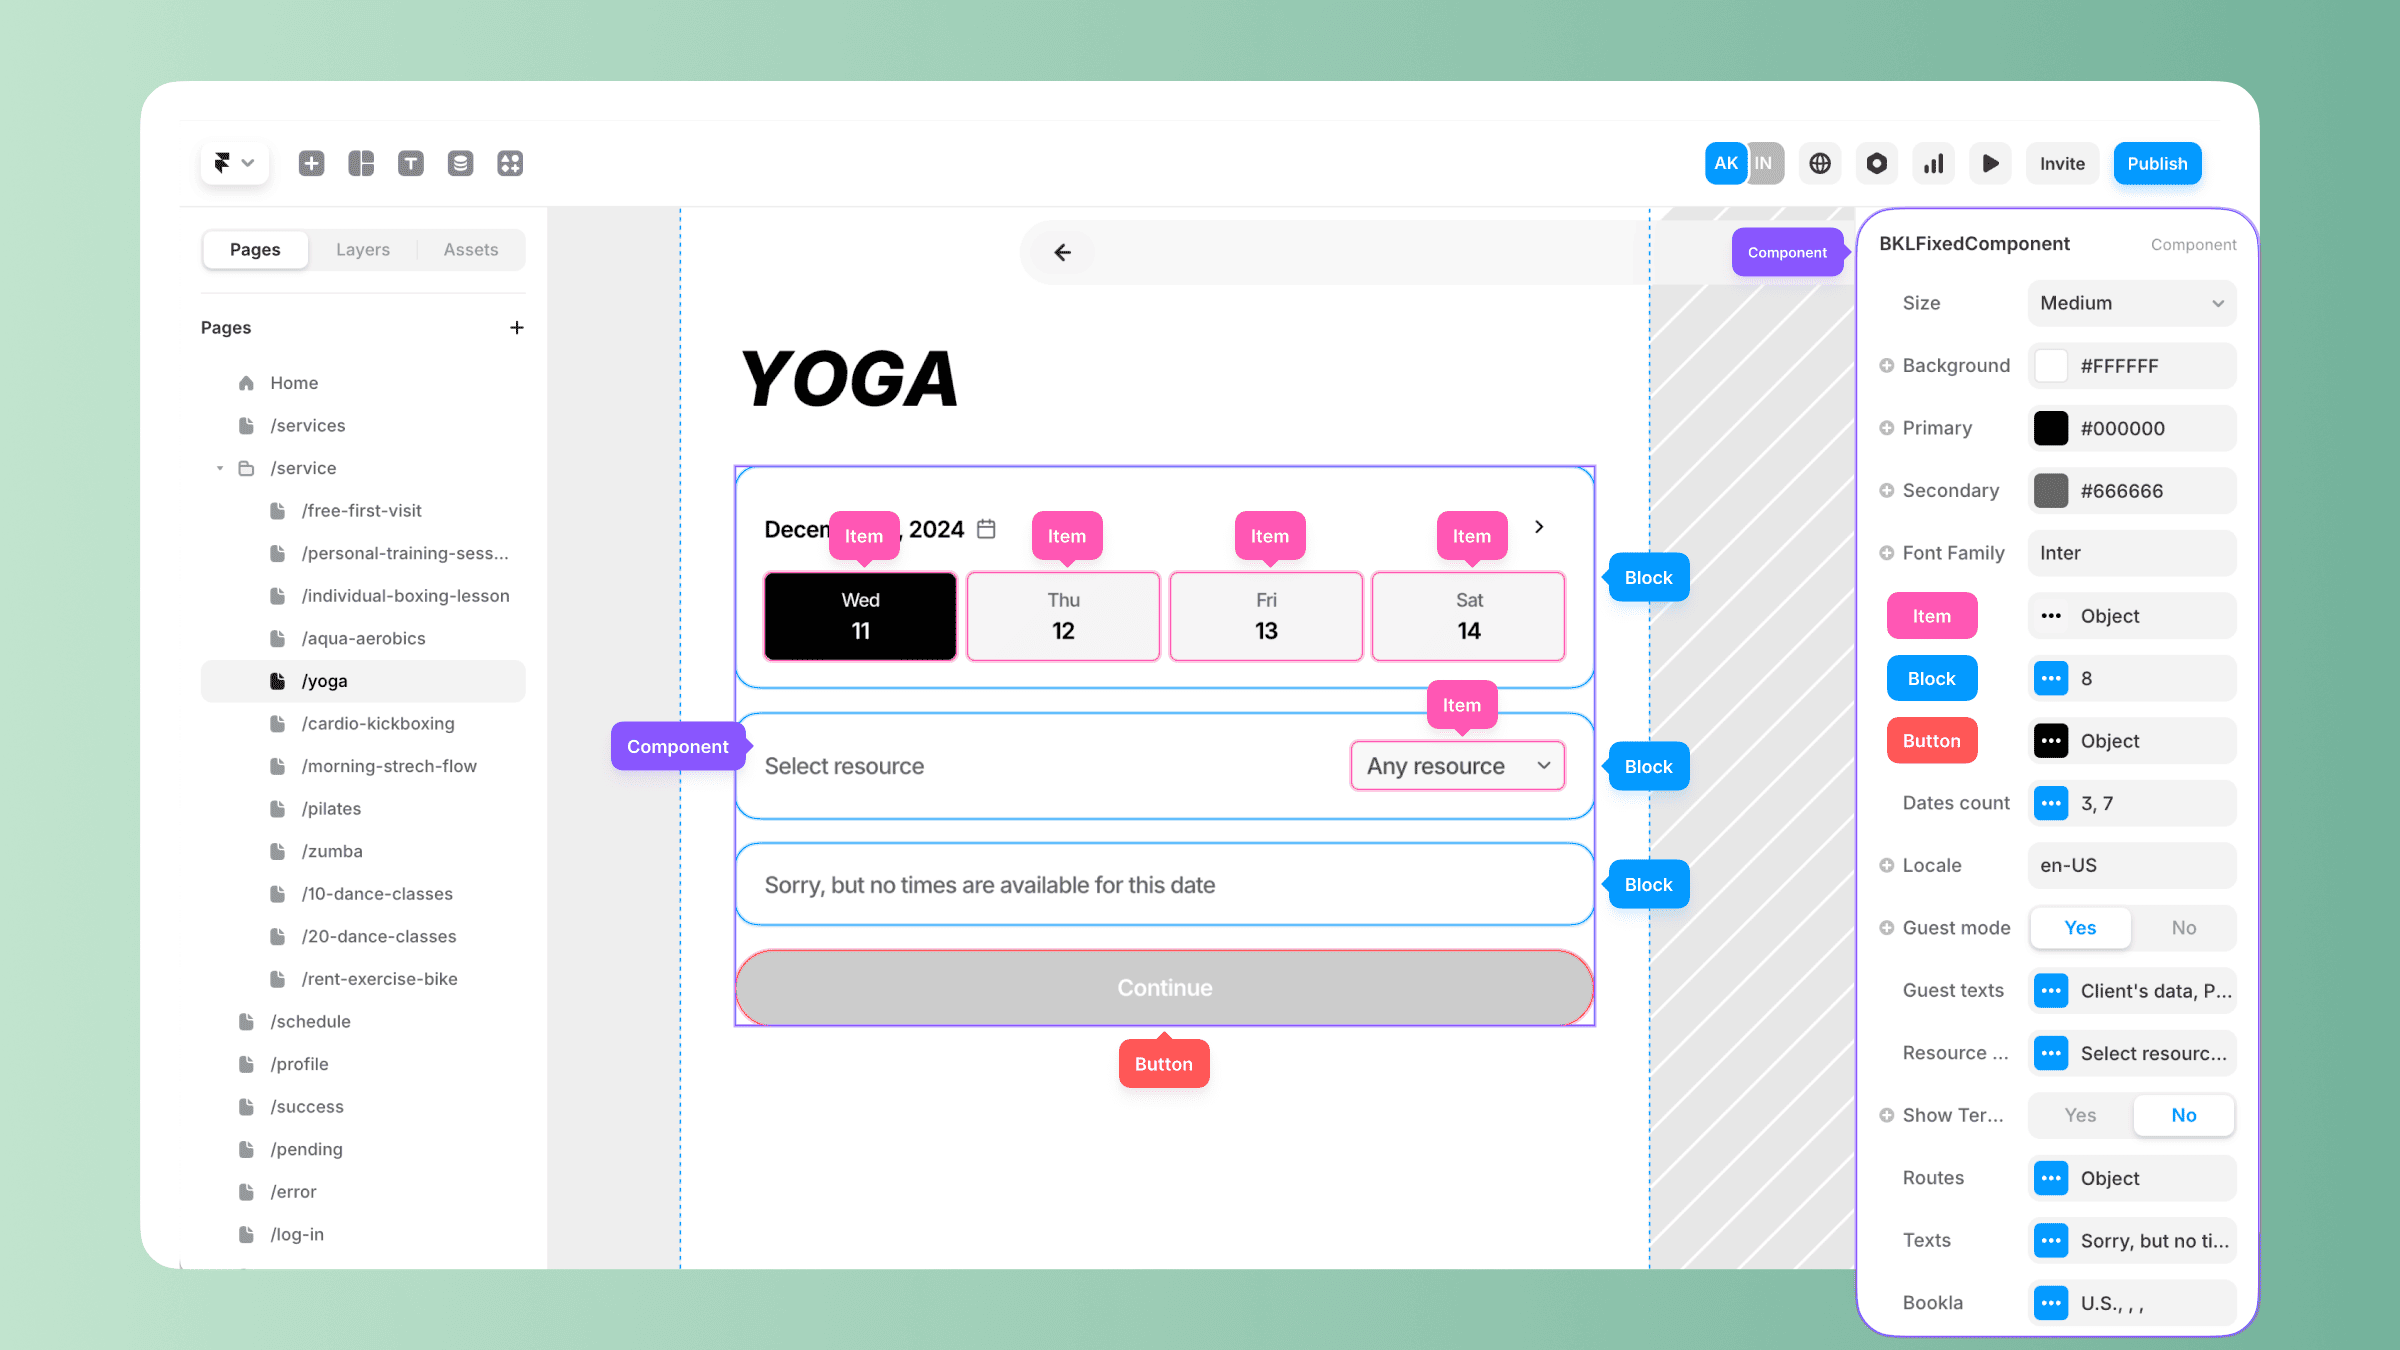
- Widget.
- Block.
- Item.
3.2. UI Customisations
1. Widget’s Size. Adjust the widget’s overall size (e.g., small, medium, large) to fit your design.
2. Colors. Update the Primary , Secondary and Background colors to set the tone of the basic elements. Use more advances customisation for key elements such as Button, Blocks Items.
3. Font. Change a font that aligns with your website or app's design style. As a defaut we use the font the Framer uses — Inter.
4. Gap & Paddings. Easily adjust the spacing within the widget to align with your design preferences. Use gap to control the space between blocks (manage inside blocks input) and paddings to fine-tune the inner spacings.
3.3. System Customisations
- Dates Count. Control how many days are shown in the widget (e.g., 3, 7 days).
- Locale. Set the locale to determine date formats and language (e.g., US-style MM/DD/YYYY vs. European DD/MM/YYYY).
- Guest Mode. Toggle guest mode to allow or restrict guest bookings. You can customize texts for guest mode fields to guide users.
- Additional: Resource, Participants, Duration & Tickets. The availability of these blocks depends on the type of component and the service within it. Click on 3 dots related to section to manage any of them.
- Texts. Edit any static or dynamic text in the widget, making it suitable for your brand tone or language.
- Routs. Configure navigational routes, such as where users go after completing a booking (e.g., success page or error page).
- Bookla. Input and manage Bookla-specific data such as Company ID, resources, or API keys.
Step 4: Set Up Routes
Routes are paths where the widget can redirect users based on their booking status. Here's how to configure them:
1. Check what a Booking Policy did you selected. You can update it any time in Bookla Platform: Services > Your Service > Settings > Booking Policy.
- Instant Booking: Redirects users to the Confirmed route if the service is successfully booked immediately.
- Needs Confirmation: Redirects users to the Pending route.
- Needs Pre-payment: The widget will prompt the user for prepayment. Payment setup can be configured using the Payments plugins in the Bookla Platform.
2. Create Redirect Pages. In your project (e.g., Framer), create the pages for the necessary routes (Confirmed and/or Pending).
3. Link the Pages to the widget. Add the links to these pages in the widget settings to ensure proper redirection.
Step 5: Connect the widget to the Platform
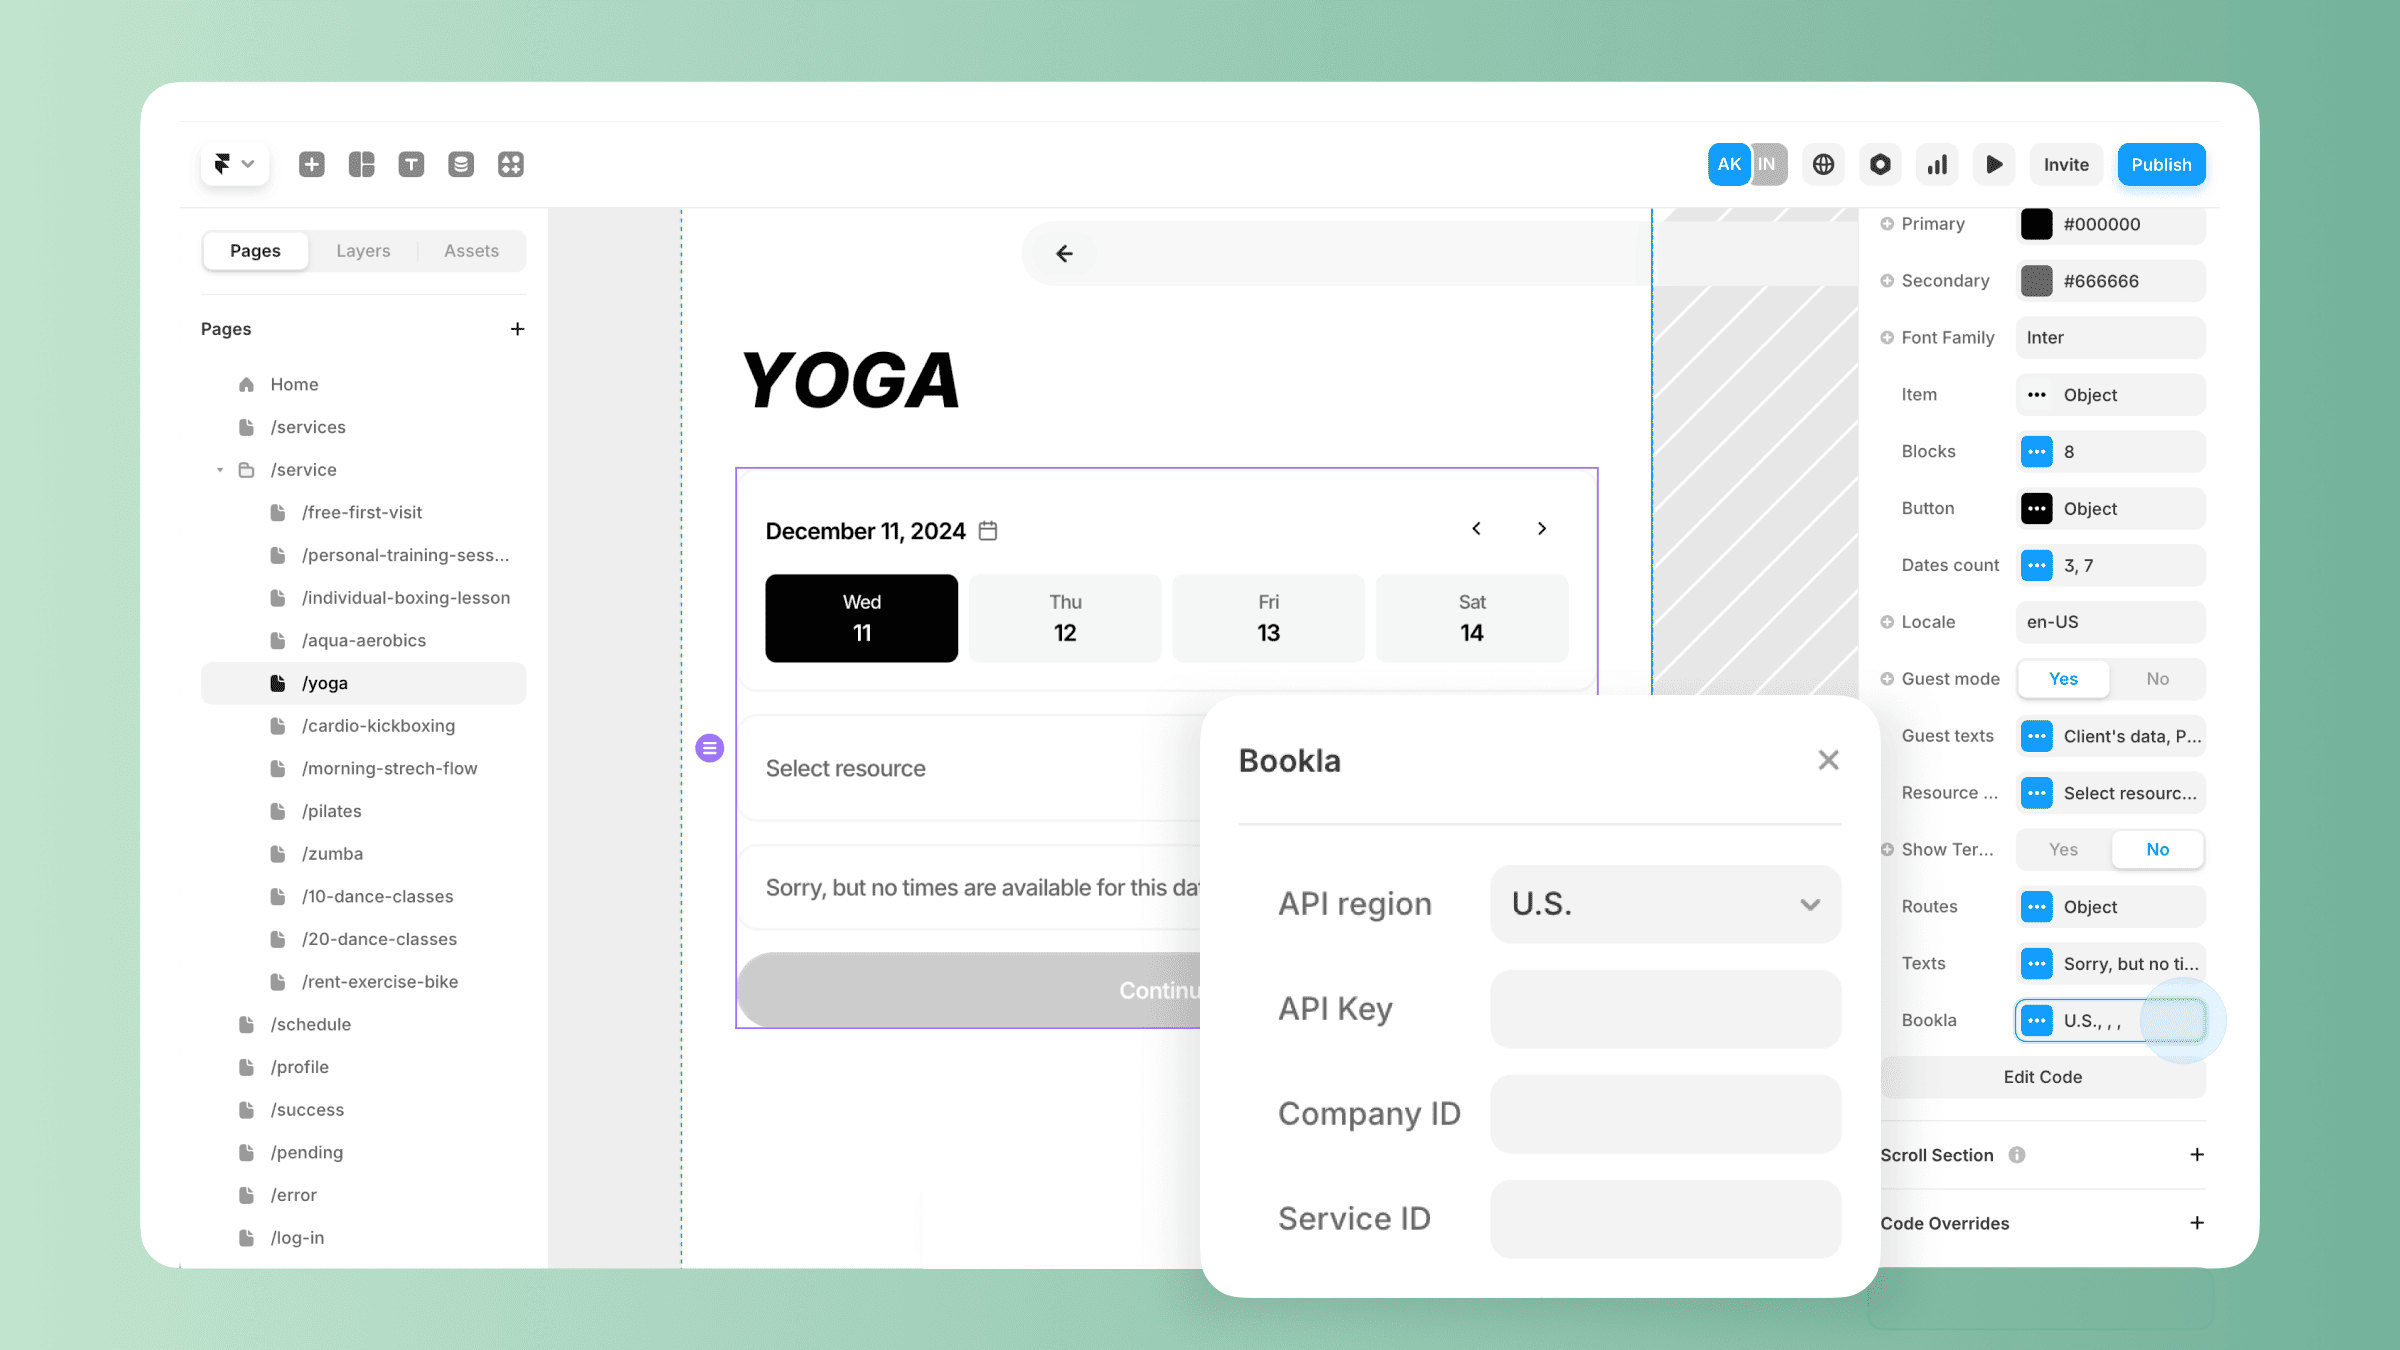
Scroll down the right section. In the bottom of Booking widget you can see ��‘Bookla’ Section. Click on 3 dots to manage it.
To set it up you need:
5.1. Set Up API Region
Select your API region. Now only US and EU are available.
5.2. Generate API Key
For the widget to work, you need to generate an API.
- Go to the Bookla Platform portal.
- Open the
Developerssection on the bottom left. - Click on the
API Keyssection. - Click on the
Create API Keybutton. - Select only the scopes that are related to client:
Guest Client- for guest mode.Booking- all scopes.Client Service- all scopes.Client Resource- all scopes.
- Click on the
Createbutton.
5.3. Enter Company ID
- Go to Bookla Platform
- Open
Companypreview on the top left. - Copy the ID that you see on the top of the company’s card.
5.4. Enter Service ID
- Go to Bookla Platform
- Open
Serviceson the left & select service that you want to book. - Copy the ID that you see on the top of the service’s page.
Step 6: Testing the Integration
Debugging Tips
- Double-check that you’ve added
API Region,API key,Company IDandService ID
- Double check that your widget and service have the same types.
- How to Connect the widget with the Platform
Preview Mode
- Use Framer’s preview mode to test the look and functionality of your booking widget.
Test Bookings
- Do a test booking from your email to test the functionality. Bookla provides 20 free bookings for users without subscription, so don’t worry it’s a free.
- Verify that bookings are reflected correctly, check them in
Bookings.
Publish
- Don’t forget to press Publish to add the page with changes on your website.