How to Integrate Bookla Widget into Shopify
By integrating the Bookla swidget into your Shopify store, you can offer your customers smooth and easy online booking right on your site.
It’s easy to set up, doesn’t require any coding skills, and you can manage everything easily from your Shopify admin panel.
How to add Bookla widget into Shopify
1. Go to the Online Store section, then click on Themes.
2. Click on the three dots (•••), then select Edit code.
3. In the Sections folder, click Add a new section.
Select Liquid as the type, enter a file name, example, "Bookla-widget" and click Done.
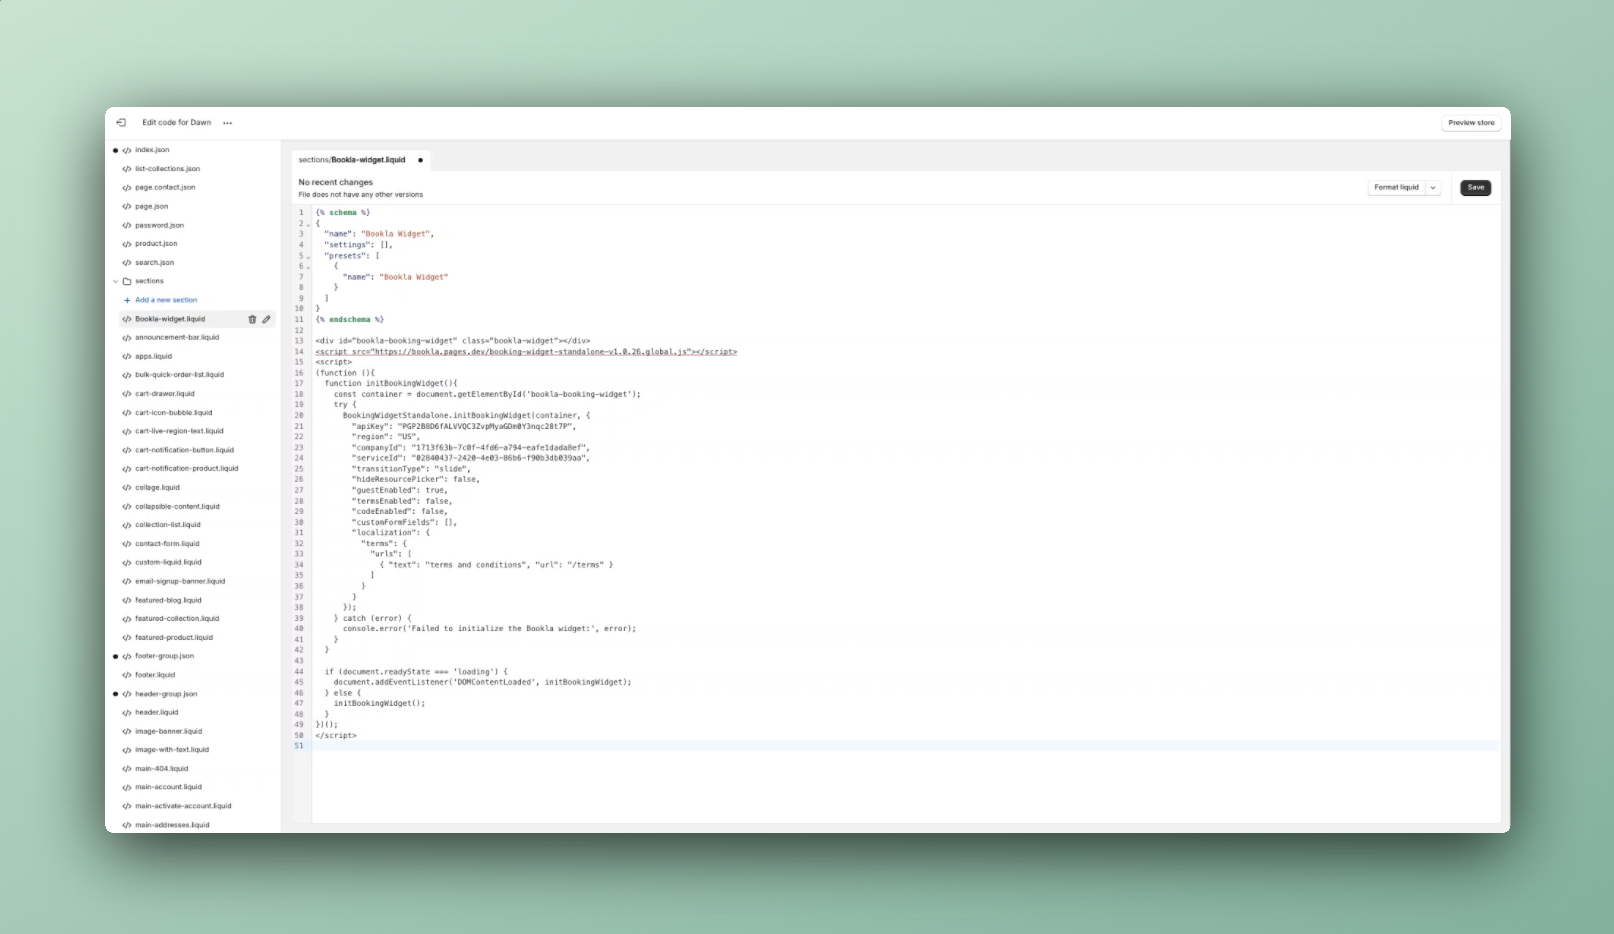
4. Delete the default code and replace it with the Bookla widget code.
You can find the widget code here and edit it: Bookla widget
Also, to define the Shopify section's name, settings, and presets, add the following schema block:
{% schema %}
{
  "name": "Bookla Widget",
  "settings": [],
  "presets": [
    {
      "name": "Bookla Widget"
    }
  ]
}
{% endschema %}
5. Click Save, then Exit.
6. Click on Customize.
7. Click Add section, choose Bookla Widget, and click Save.
Test the widget
1. To test the widget, go back to the dashboard by clicking Exit.
2. Click View your store.
3. Select a date, resource, and time, then click Continue.
4. Enter first name, last name, and email, then click Book now.
Once booked, a confirmation message will be displayed.
By following these simple steps, you’ve successfully integrated the Bookla booking experience into your Shopify store.