Car Rental Booking System in Framer
In this tutorial, you’ll learn how to build a complete car rental booking system in Framer.
We’ll go step by step through creating resources and services, setting flexible pricing rules, and integrating an open-source rental component.
You’ll also see how to connect everything with Bookla using API keys, company IDs, and service IDs, and finally test the booking flow directly in Framer.
By the end, you’ll have a fully working rental system where clients can choose dates, set pickup and drop-off times, and instantly see the correct price before completing their booking.
Creating Resources
- Go to the section "Resources".
- Click "+ New Resource".
- Enter resource names (for example, car model).
- Click "Create".
- Create as many resources as you need.
Note
You need to create as many resources as you have cars in your rental service.
For example, if you have 4 Audi A4 cars, then you should create 4 separate resources for them.
Creating Services
- Go to the section "Services".
- Click "+ New Service".
- Enter a service name (for example, "Volvo XC60 rental").
- Select the service type.
Note
For car rentals, choose "Flexible" because the duration of bookings can vary.
- Select a booking interval.
- Choose a booking policy:
- Instant booking: The client instantly books the service without payment.
- Needs confirmation: The booking requires your confirmation.
- Needs prepayment: The client must prepay to confirm the booking.
- Click "Create".
Connecting a Service to a Resource
- Click "+ Link with Resource".
- Select the resource(s).
- Click "Link".
Creating Pricing Rules

To understand pricing rules, look at the image above, which shows 3 pricing steps:
- One week
- One day
- One hour
For example, if the booking duration is 8 days and 4 hours, the system will apply:
- One week rule
- One day rule
- 4 × one hour rule
In total, this results in $270.
Adding the Currency
- Go to the section "Pricing".
- Set the currency by clicking "Click to set".
- Choose your desired currency.
- Click "Save.
Adding price rule for 1 hour rate
- Click "+ Add price rule".
- Set duration to 1 hour.
- Set the price for a 1-hour rental.
- Set priority.
Note
The higher the number, the higher the priority for the price rule.
- Click "Create".
Adding price rule for 24 hour rate
- Click "+ Add price rule".
- Set duration to 24 hours.
- Set the price for a 24-hour rental.
- Set priority.
Note
The priority should be set slightly higher, as it ranks above the 1-hour rule in the hierarchy shown in the image.
- Click "Create".
Adding price rule for 1 week rate
- Click "+ Add price rule".
- Set duration to 168 hours.
- Set the price for a 1-week rental.
- Set priority.
Note
The priority should be set higher than the previous two price rules, because of the hierarchy shown in the image.
- Click "Create".
Note
You need to create as many services as you have different types of cars. For each car type, create separate price rules using the same steps as above.
Open-source rental component integration
We recently released open-source booking components that you can use on your website.
For example, we have a dedicated category of Framer components that can be added as code components in your Framer projects.
You can edit and modify them, or even use them as prompts for ChatGPT or another AI tool to generate variations or add new features.
In this tutorial, we’ll also use the Rental component.
The component looks like this:
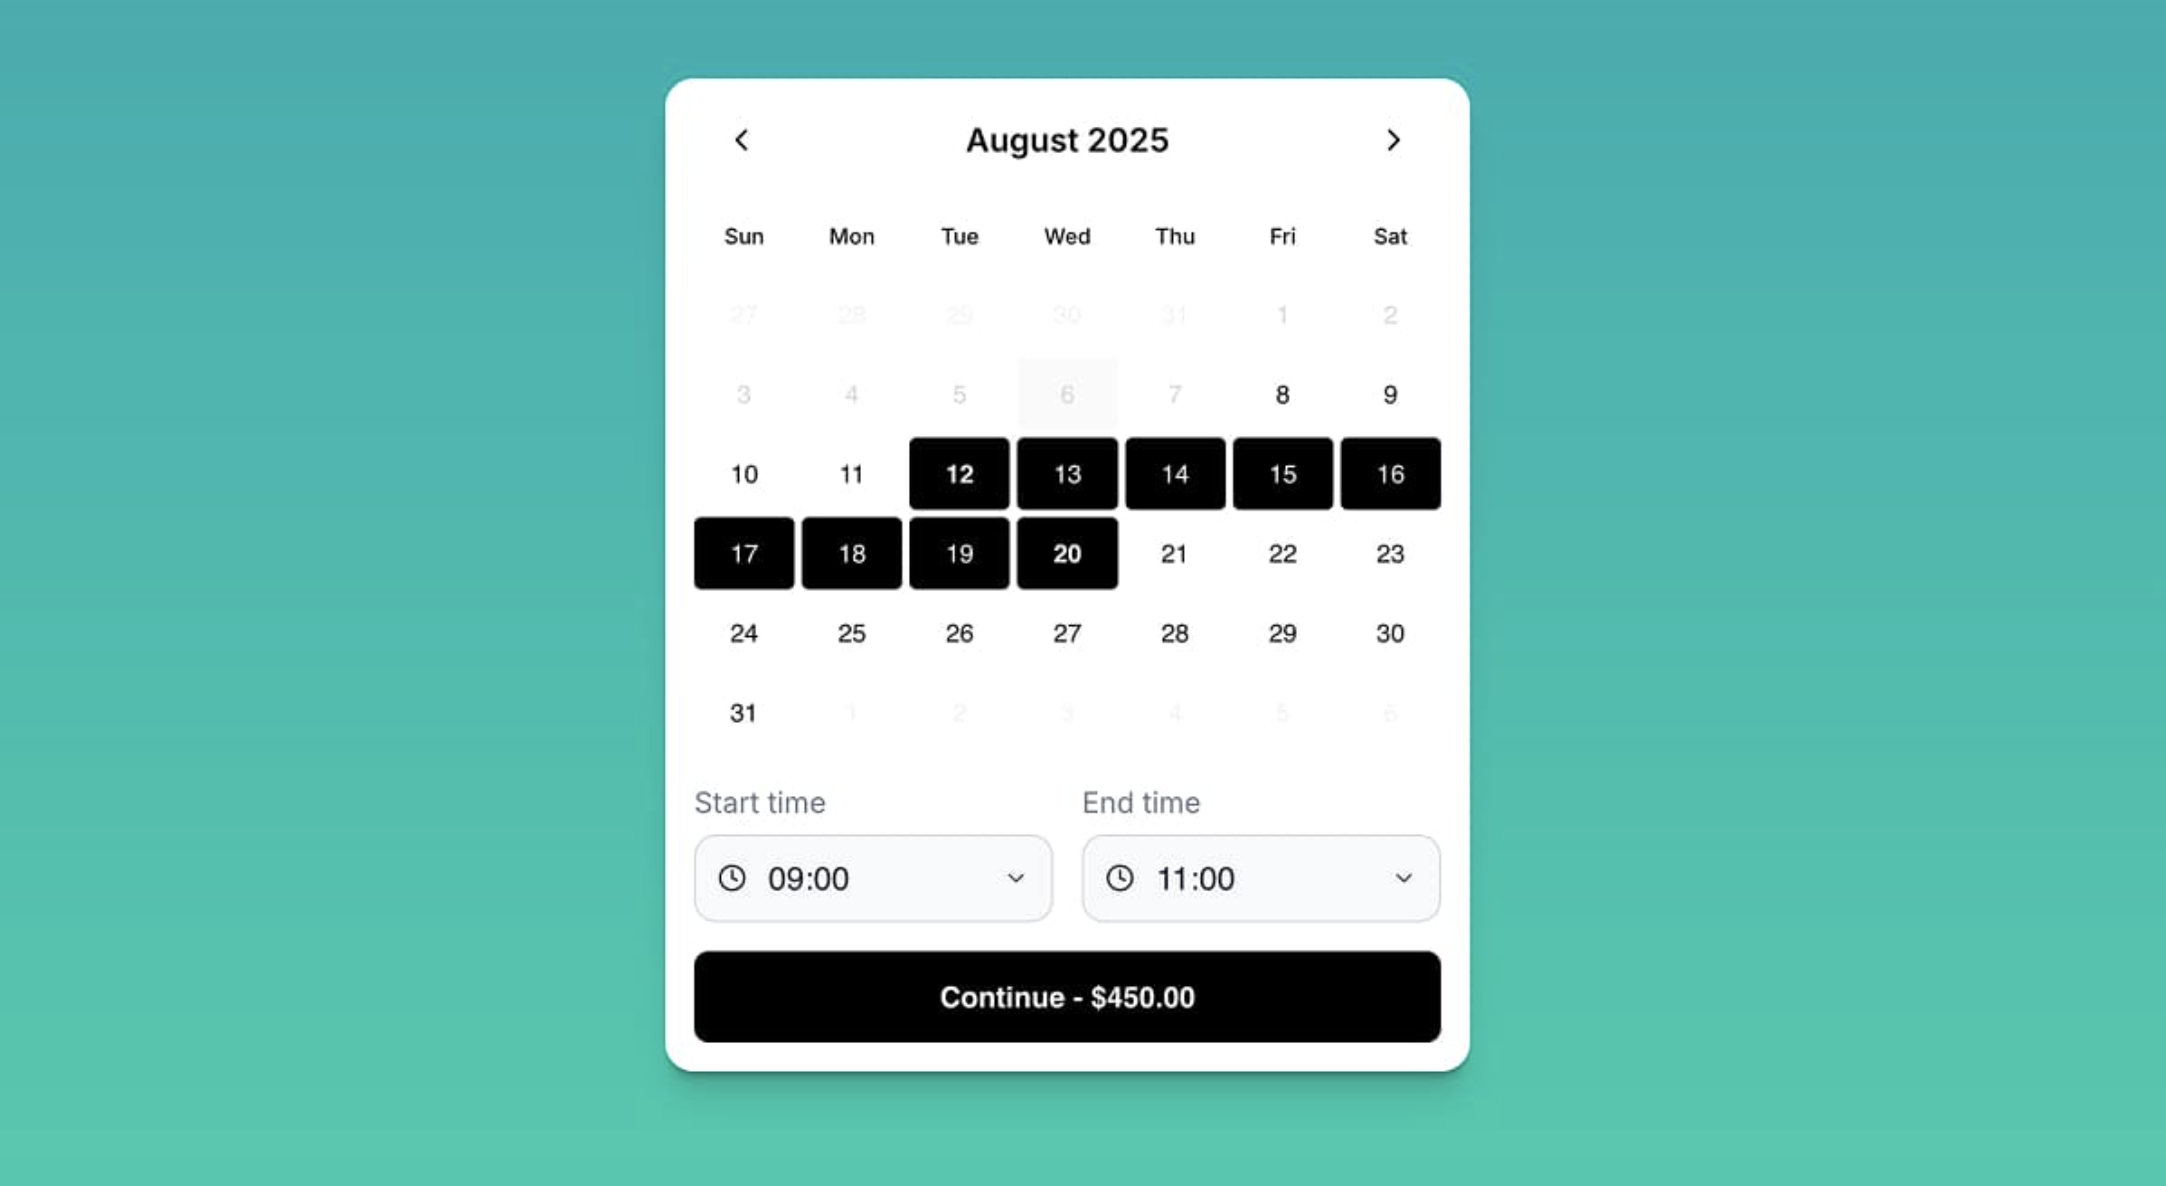
Here, the client can select a date range, start time, and end time.
This allows the client to choose both pickup and drop-off times for the car rental.
How to use rental component
- Go to Open-source Components.
- Find the Rental component.
- Scroll down to "Component.tsx".
- Click on "Component.tsx".
- Copy the code.
- Go to Framer.
- Open the section "Assets".
- In the code section, click "+".
- Click "New Code File".
- Write the title, for example "BookingComponent".
- Click "Create".
Note
By default, it is an animated square.
- To change it, replace the default code with the copied code for the rental component.
- Go back to the page.
- Select the container where you want to place the component.
- Go to the section "Assets".
- Drag and drop the component.
- Adjust the component’s width and height.
- Make some changes: for example, remove padding, or change the selected color and button color.
How to connect component to Bookla
- Go to the Bookla section.
- Check the API region in Bookla (US or EU).
- Paste it into the API Region field.
- To copy and paste the API key:
- Go to the Bookla Platform.
- Go to the Developers section.
- Click "Create API key".
- Write a name, for example "Car rental key".
- Select only the following client permissions: Client Service, Client Resource, and Guest Client.
- Copy the API key (you will have access to it only once).
- Paste it into Framer at "API key".
- To copy and paste the Company ID:
- Go to the Bookla Platform.
- Click on "Company".
- Copy the ID at the top.
- Paste it into Framer at "Company ID".
- To copy and paste the Service ID:
- Go to the Bookla Platform.
- Go to the "Services" section.
- Select the relevant service.
- Copy the Service ID.
- Paste it into Framer at "Service ID".
Testing the component
- Go to the page.
- Select a time period.
Note
You can see that the price changes based on the selected period.
- Click "Continue".
- Enter the required data.
- Click "Make booking".
- The reservation is created, and you can also see it in the Bookla Platform.
Get Involved
We want these tutorials to address your real-world needs. If you have specific use cases or scenarios you'd like to see covered, please:
- Open an issue in our GitHub repository with the label "use case request".
- Provide a brief description of your business type and the specific challenge you're trying to solve with Bookla.
Your input will help us prioritize and develop the most relevant content for our developer community.
We appreciate your patience as we work on creating valuable, practical content to support your Bookla implementation journey. In the meantime, don't hesitate to explore our API documentation and reach out to our support team if you have any questions.